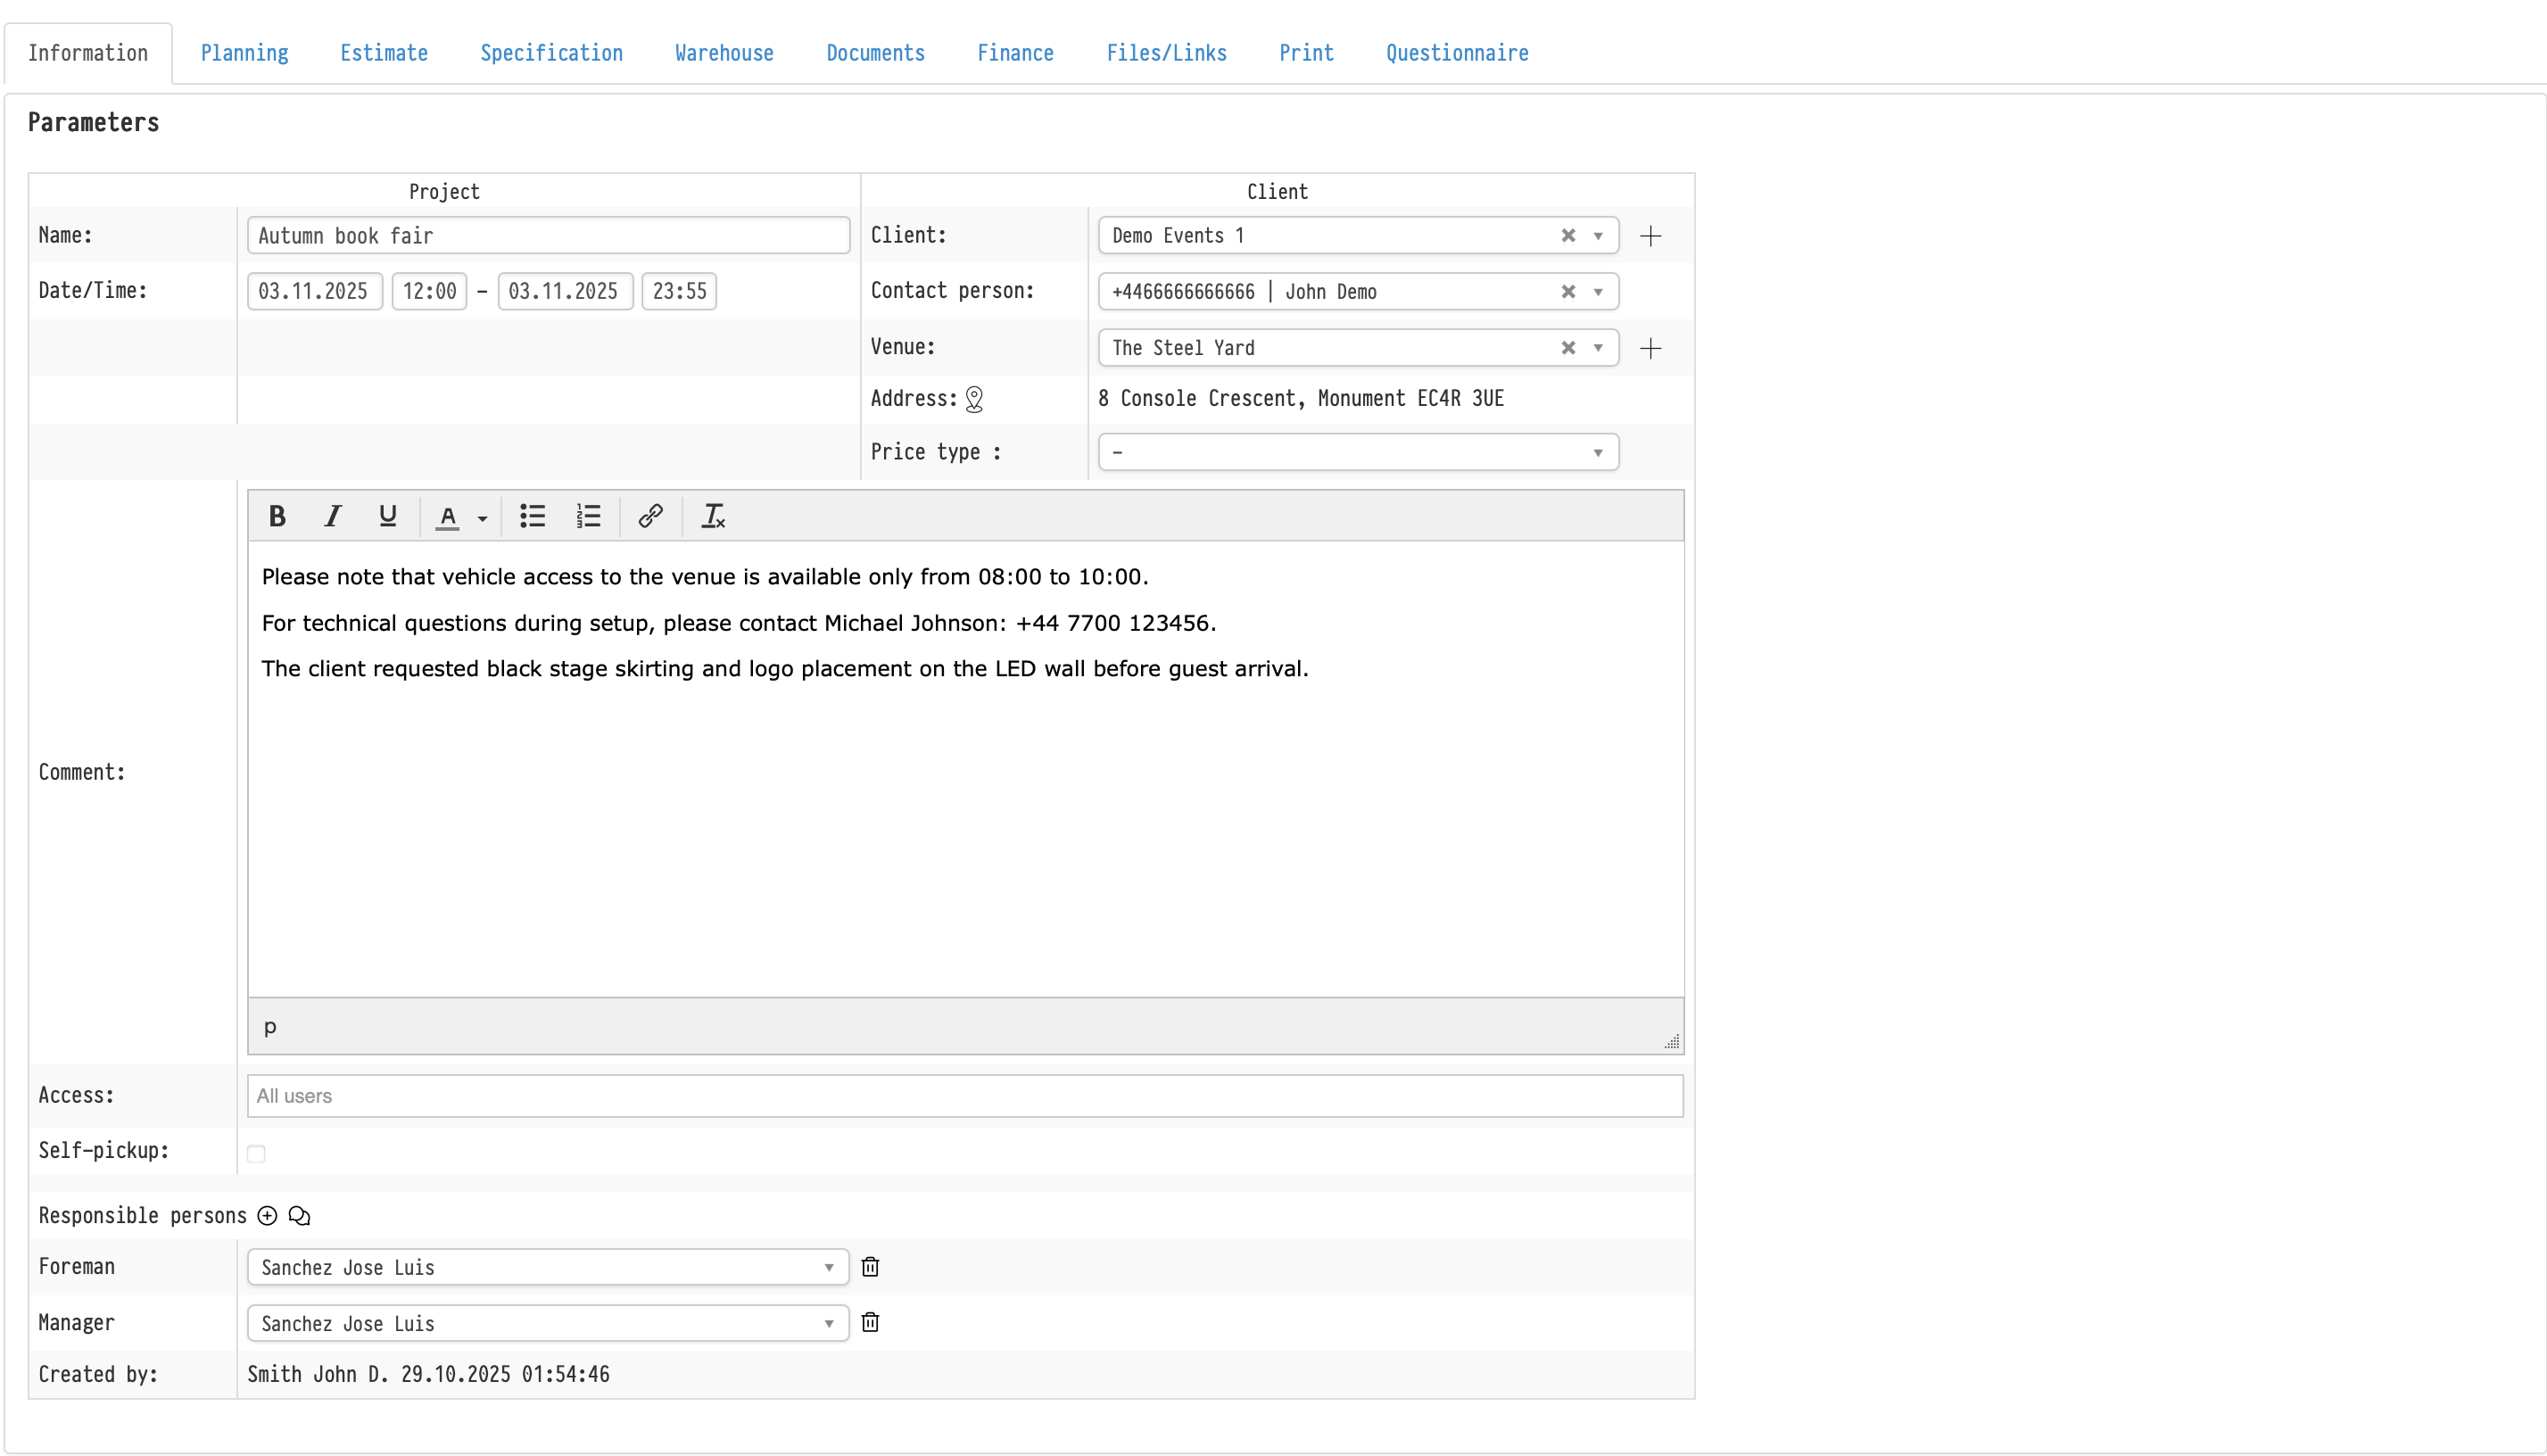
Information tab
The Information tab is the main page of the project card.
Here you can configure the basic project parameters, select the client and venue, define the price type, assign responsible users, configure project visibility, and create a project chat.
Project parameters
The upper section of the page contains the main project information:
- project title;
- project dates and time;
- client;
- contact person;
- venue;
- address;
- price type;
- comment;
- project access;
- responsible users.
Client
The Client field is linked to the Clients database.
After selecting a client, the system can automatically fill in related data, for example:
- contact persons;
- assigned price type;
- other related information.
Contact person
The Contact person field allows you to select a contact linked to the selected client.
Venue and address
The Venue field is linked to the Venues database.
After selecting a venue, the system can automatically fill in the project address.
Price type
The Price type field allows you to select one of the previously created price types for the entire project.
After selecting a price type:
- all rental prices in the Estimate will use prices from the selected type;
- the catalog tree inside the Estimate tab will display the corresponding prices;
- the selected price type will apply to all Estimate sheets inside the project.
If a default price type is assigned to the client card, it will be selected automatically after choosing the client.
You can read more in the separate article about Price types.
Comment field
The Comment field supports text formatting.
You can use:
- bold text;
- lists;
- links;
- text colors;
- and other editor tools.
The formatting is also transferred to generated PDF documents, including Commercial Proposals.
Self-pickup
The Self-pickup option affects only the project display in the Calendar.
If enabled:
- a house icon will appear on the project card in the Calendar;
- the project can be filtered separately using Calendar filters.
This option does not affect warehouse logic or project workflow.
Responsible users
The Responsible users block allows you to assign project roles and responsible users.
Examples of roles:
- manager;
- foreman;
- project manager;
- technical director.
The list of available roles is configured in:
Empoyees database → Options → Roles
The default role display in new projects is configured separately in:
Global settings → Project
Adding responsible users
The “+” button allows you to add a new role to the current project.
After pressing the button, a modal window opens with two selectors:
- role;
- user.
Removing roles
The trash icon removes the role only from the current project.
At the same time:
- the role is not deleted from the system;
- the user is not deleted;
- other projects are not affected.
Flexible role assignment
The system supports flexible assignment logic:
- one user can be assigned to several roles;
- several users can be assigned to the same role.
Project chat
The chat icon next to the Responsible users block creates a project room.
The room:
- opens in a separate browser tab;
- works inside the built-in Golova corporate messenger;
- is created automatically after the first click on the icon.
How users are added to the chat
Users are automatically added to the project chat if they are:
- assigned as responsible users;
- added as personnel in the Planning tab.
Important
The project chat and project access are independent systems.
A user may:
- have access to the project but not participate in the chat;
- participate in the chat but not have access to the project itself.
Chat access logic
Removing a user from the Access field does not automatically remove them from the chat.
A user loses access to the chat only if they are removed from:
- responsible users;
- personnel in Planning.
Project access
The Access field controls project visibility inside the system.
If a user does not have access to the project:
- the project will not appear in the Calendar;
- the project will not appear in tables or lists;
- the user will not be able to open the project directly.
Even if a user accidentally opens a direct project link without access, the system will display the message:
“You do not have access to this project. Please contact your administrator.”
How access works
Project access works together with access templates from the Staff database.
Access templates have higher priority and define the general access level to projects.
The Access field inside the project does not override the access template, but works within its limitations.
Access template settings
The settings are located in:
Empolyees database → Options → Access templates
The following options are available for the Project section:
- all;
- general and personal;
- personal;
- none.
“All” option
The user can see all projects in the system regardless of the Access field.
The project access field is ignored in this case.
“General and personal” option
The user can see:
- projects with All users access;
- projects where the user was added manually.
“Personal” option
The user can only see projects where they were explicitly added to the Access field.
Projects with All users access will not be visible.
“None” option
The user will not see any projects in the system.
Access field
By default, all new projects are created with:
“All users”
You can also:
- remove general access;
- manually select specific users;
- search users by name;
- remove users from the list.
Only system users can be selected in the Access field.
Groups, departments, or roles cannot be selected.
Important
The Access field:
- affects only project visibility;
- does not restrict individual project tabs;
- is not connected to roles;
- does not affect Planning;
- does not control access to the project chat.
Access to individual system sections is configured only through access templates in the Staff database.
Key concepts
Information, Project, Access, Responsible users, Users, Roles, Access templates, Project chat, Client, Venue, Price type, Comment, Self-pickup