An article is a quantitative expression of a position, i.e. a specific equipment with its own unique identification number.
Example: The JBL SRX112 speaker system is a Catalog Item (Equipment). It can be added to the estimate, it costs 3000 rubles. It has dimensions, weight, which help with project planning. An article is a concrete material object. If you have four such speakers in stock, then you have four articles.
To create Articles for Equipment, select the position you need in the catalog tree or double-click in the workspace in the center of the screen. Above the workspace there will be an icon "add quantity" - a barcode with a "+" icon. When you click on the icon, a dialog box for adding articles will appear.

In the Quantity field, specify the quantity you want to add.
In the Purchase field, you can specify the date and cost of the purchase of this Equipment.
From the Warehouse drop-down list, you can select your warehouse where these articles will be stored.
The parameters can be set manually (they will be put down for all created articles), you can copy from the Position parameters, or copy from the last filled article.
After clicking the Add button in the dialog box, the specified number of Articles will appear in the catalog, their numbers will be generated by the system, but they can be changed in the Article menu. The number of Items for which you have created Articles will also change.

Equipment SKU card
To make the SKU card appear on the right side of the catalog, you need to select the article you are interested in from the central part of the workspace. The SKU card consists of three tabs: 'Information', 'Fields', and 'Files'.
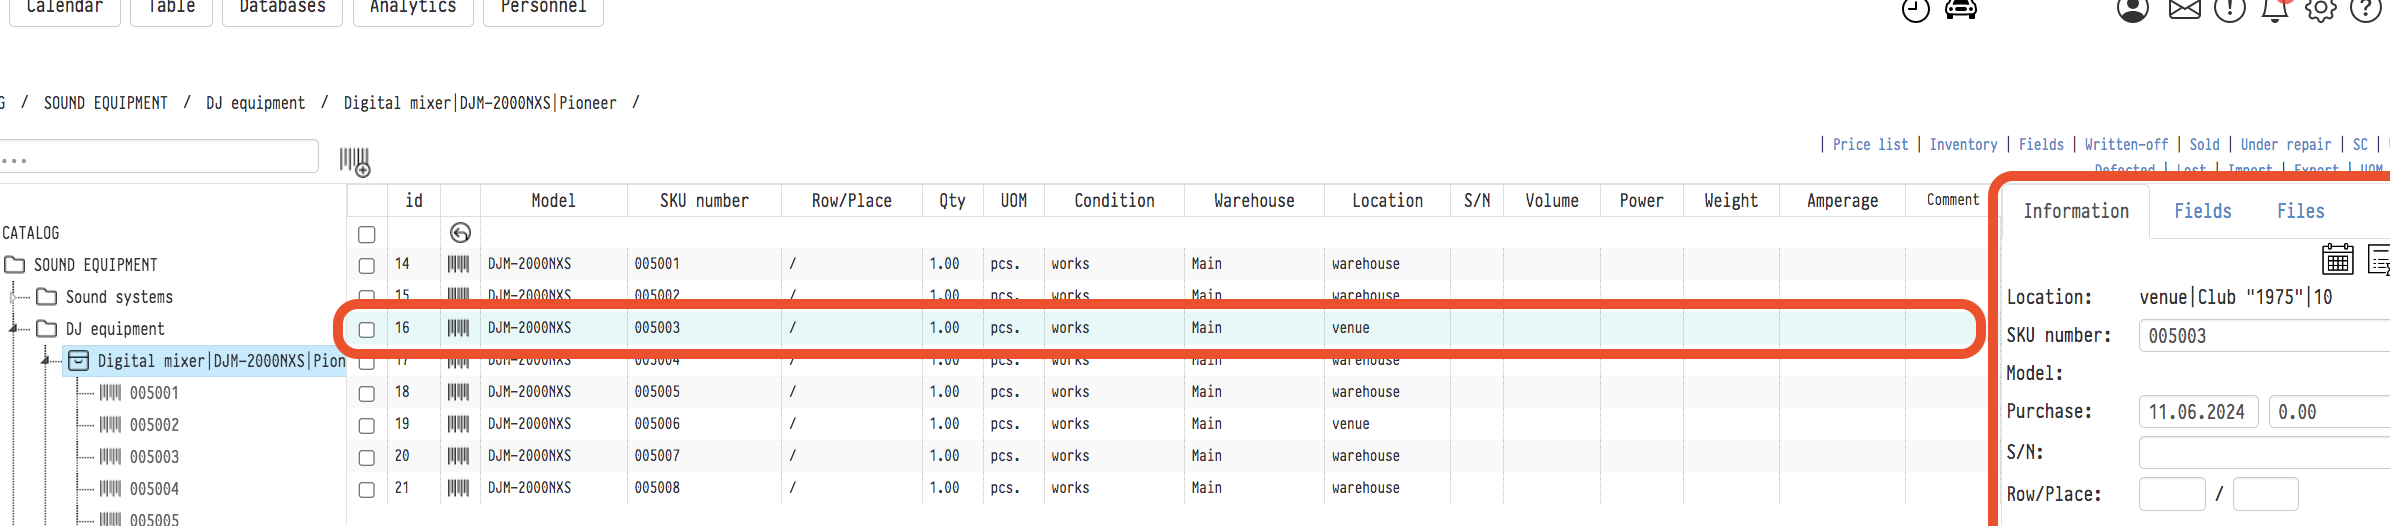
1) Information tab
In the upper right corner of the information tab there are three icons — Calendar, SKU History and Project Movement History.

The Calendar shows the projects in which this article was involved.

In the History of the SKU — all changes that occurred with the Article in the Catalog.


In the Project Movement History, movements by Article by statuses within projects are displayed (for example, from "collected" to "shipped" or to "accepted")


Current location. This field shows where this Article is currently located. Possible options: warehouse, service center (its name), site (the site and the project number will be indicated).
Article number. Here you can manually set the article number. If the number is already used in the catalog, the system will show an error.
Purchase. In this field, you can set the date of purchase of this article and its cost. If you filled in these details when adding the article, they will be listed here.
S/N — serial number. This refers to the serial number of the equipment from the manufacturer, and not the article, which is the identifier of the device in the system.
Row/Place. Warehouse coordinates of this article.
Quantity. For the Equipment item type, the quantity will always be equal to 1. By clicking on "Change" next to the quantity, you can perform the actions "Write off", "Sell", "Send to the service center". When debiting and selling, the article will be included in the corresponding lists (see the Top menu of the Catalog) and will be removed from the balance, i.e. the total number of this item will decrease, and the Article will no longer be displayed in the Catalog when choosing a Position. When moving to the service center, the article will be in the "Under repair" list, but it will not disappear from the balance.
Warehouse. Here you can choose which of your warehouses the article is stored in. Warehouses are created in the "Warehouses" database in the top menu of the Catalog. Please note: these warehouses can be used for your internal navigation to make it easier to find equipment (for example, "Back Room", "Second Floor", etc.). These are not different balances between which you can make moves, etc.
Parameters. Physical parameters of the article. To the right of the title there is an icon "Apply parameters to all articles". When you click on it, the values specified here will overwrite the parameters of other articles in this position.

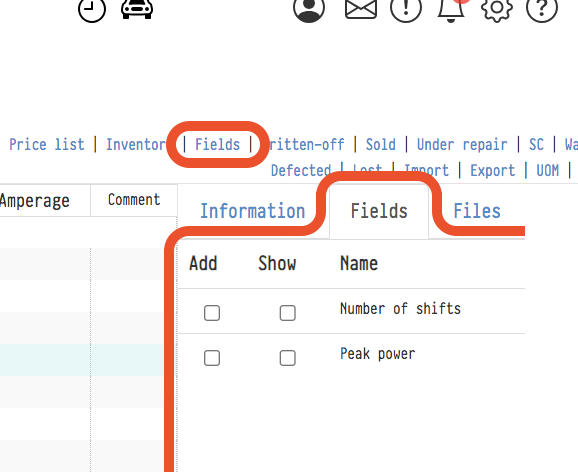
2) Fields tab
Just like in the Equipment card, additional fields can be added in the SKU card. They are created in the Fields section of the Catalog's top menu.
3) Files tab
To the right of the Fields tab is the Files tab, where any documents related to the equipment can be uploaded. These could include a license, insurance, photos, a user manual, or any other information that might be useful to keep alongside the equipment.

4) The Monetary transactions tab stores information about the purchase of the SKU. A record is created automatically when the item is added, even if the price is not specified (in this case it will be set to 0). The record includes the purchase date, quantity, cost, and an optional comment. You can later edit the cost and comment if needed. For equipment, the quantity is always 1. This data is used as the basis for the Purchases report in the Analytics section.